
How To Make Your Film Accessible to Audiences With Disabilities
Courtesy of the Unstoppable Programming Team
Since 2020, Slamdance’s Unstoppable program has showcased cutting-edge films made by and about individuals with disabilities. Slamdance currently requires captions for all Unstoppable submissions and encourages captions for submissions to other categories, which has prompted some questions about why, exactly, captioning is essential. Here, our team answers your questions about captioning and how to create the most inclusive film when submitting to festivals.
First things first: What is captioning?
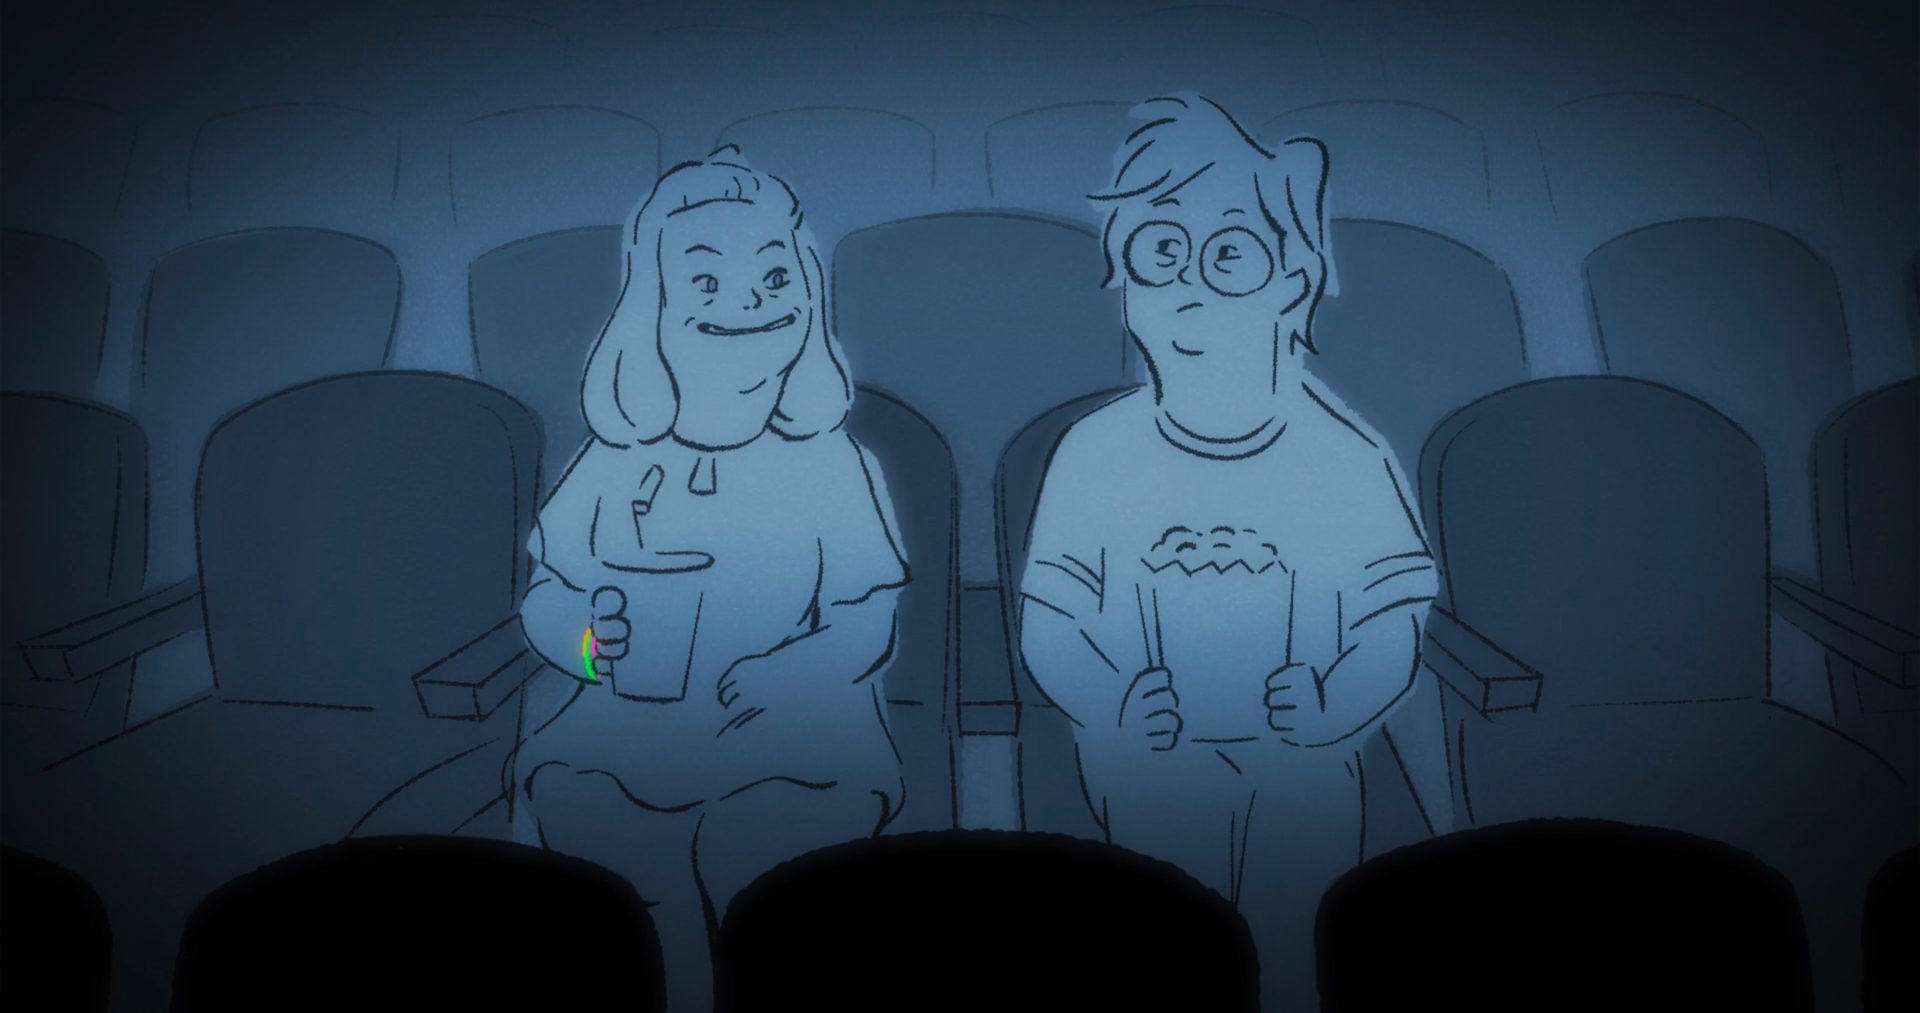
Captioning is a text display of the spoken dialogue and other crucial audio information in the film. It is generally used for audiences who are hearing-impaired. It can also be helpful for viewers who speak a different language from the audio track on the production or who simply want to read what is being said while they watch.
Why does Slamdance require captioning for Unstoppable submissions?
Slamdance requires captioning for all Unstoppable submissions because some of our programmers are deaf or hard of hearing. We want every person with a disability to feel welcomed, included, and represented. Our program's motto is "For disabled filmmakers by disabled filmmakers.” We believe that inclusion of the disability community matters, and this starts with ensuring screeners are fully accessible to every member of the Unstoppable team.
How do I add captions to my film?
As filmmakers ourselves, we understand how frustrating, expensive and time consuming last-minute edits to a screener can be. However, there are a few easy ways to add captions to an Unstoppable submission:
- Both YouTube and Vimeo offer free, automated closed captions (you may have to adjust the settings to make sure they’re “on” and visible to programmers). These are a good start, but usually require some additional editing to make sure the words onscreen are correct and make sense to the viewer.
- Editing programs like FinalCut and Adobe Premiere will allow you (or your editor!) to build captions into the film itself. This might require more time, but will ensure more accurate, detailed captions. Adobe Premiere includes an Auto Transcribe tool to help get you started, a guide to which is included at the end of this piece.
- If you have room in your budget, consider using a professional captioning service. Films that are long, dialogue-heavy or involve lots of characters speaking simultaneously may not translate well to the automated services available on YouTube or Vimeo. A professional service will ensure the most accurate captions, which will enhance the experience for those relying on on-screen text.
What is the difference between open captions and closed captions?
Open captions are embedded directly into the video image itself and cannot be turned off, while closed captions exist as a separate text file that can be enabled and disabled by the viewer. If your captions are always visible, they are open captions. If your captions can be toggled on and off (often by clicking a “CC” button), they are closed captions.
Slamdance accepts both open captions and closed captions in submissions, and you are welcome to choose the format that makes the most sense for your content and budget.
Getting Started
If you're not sure where to begin when it comes to adding captioning to your film, never fear! Here are a few tips and tricks to get you going:
- Don’t forget to proofread. Be sure that the text is free of typos and other errors, Especially if you’re captioning the film yourself (or relying on automatic captions). “Thyme” instead of “Time” or “Nero” instead of “Hero” can lead to some serious confusion for those relying on captions.
- Timing is everything. Make sure the captions appear synchronized with the dialogue or action they describe. The speed at which text appears should establish a steady pace for the viewer. Too fast, and the audience may struggle to absorb it all. Too slow, and they’re missing out on the action.
- Paint the whole picture. Dialogue is only half the battle! Captions should clearly describe the entire audio landscape, which includes music and sound effects. If there’s a bloodcurdling scream, a creaking floorboard or passionate war-cry: make sure you’re including it in the captions! The difference between “soaring piano music” and “epic guitar solo” can totally transform the viewer’s understanding of a scene.
- Get creative. Boring words are boring. Why say “loud noise” when you’ve got “deafening roar”, “sonic boom”, or “face-melting explosion”? Captions should go beyond dry, literal description, and help evoke the emotional core of your film. Netflix’s Stranger Things recently got a whole lot of buzz for their particularly colorful descriptions of alien writhing, squenching, and oozing, which helped capture the playful atmosphere of the show itself.
Captioning is an essential part of the Unstoppable program, and something that every filmmaker should know how to navigate without breaking the bank.
By following these tips, you’re creating a cinematic experience that is accessible to everyone. We appreciate your hard work as filmmakers, and thank you for making the commitment to create an inclusive film!
How To Use the Auto Transcribe Feature in Adobe Premiere
Adobe Premiere features an Auto Transcribe tool that can help you begin the captioning process during editing. Here's how to use it.
Step One:
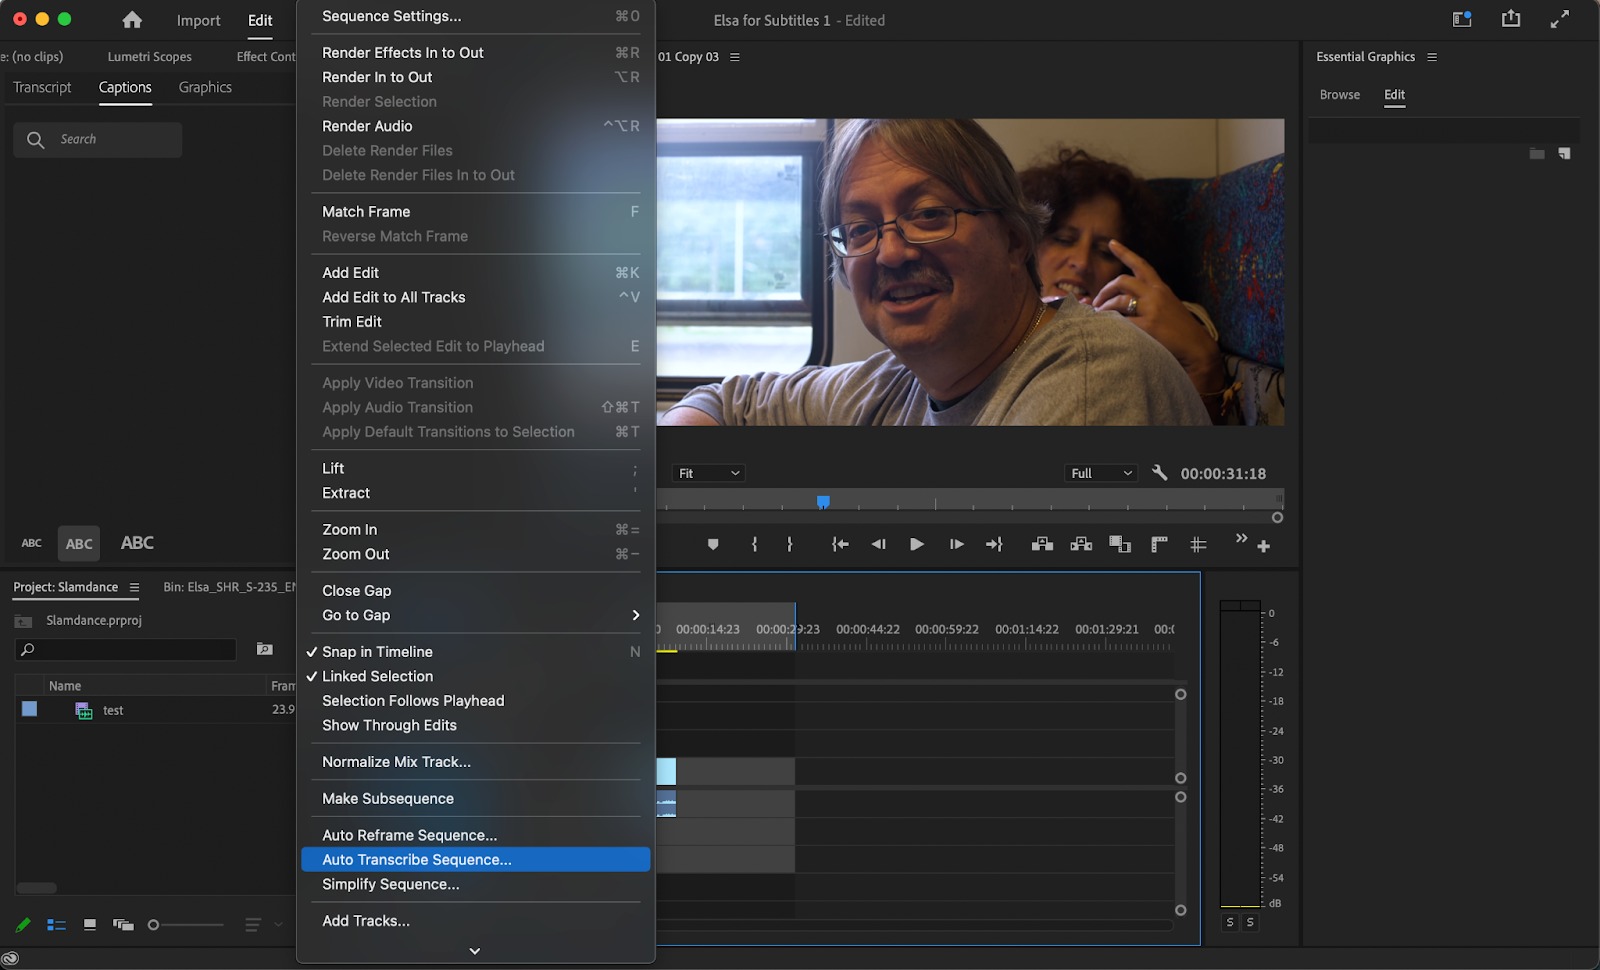
Go to Sequence > Auto Transcribe Sequence and click Transcribe in the new pop-up window. You can also find this option by searching "transcribe" in the search bar under the Help menu.
Step Two
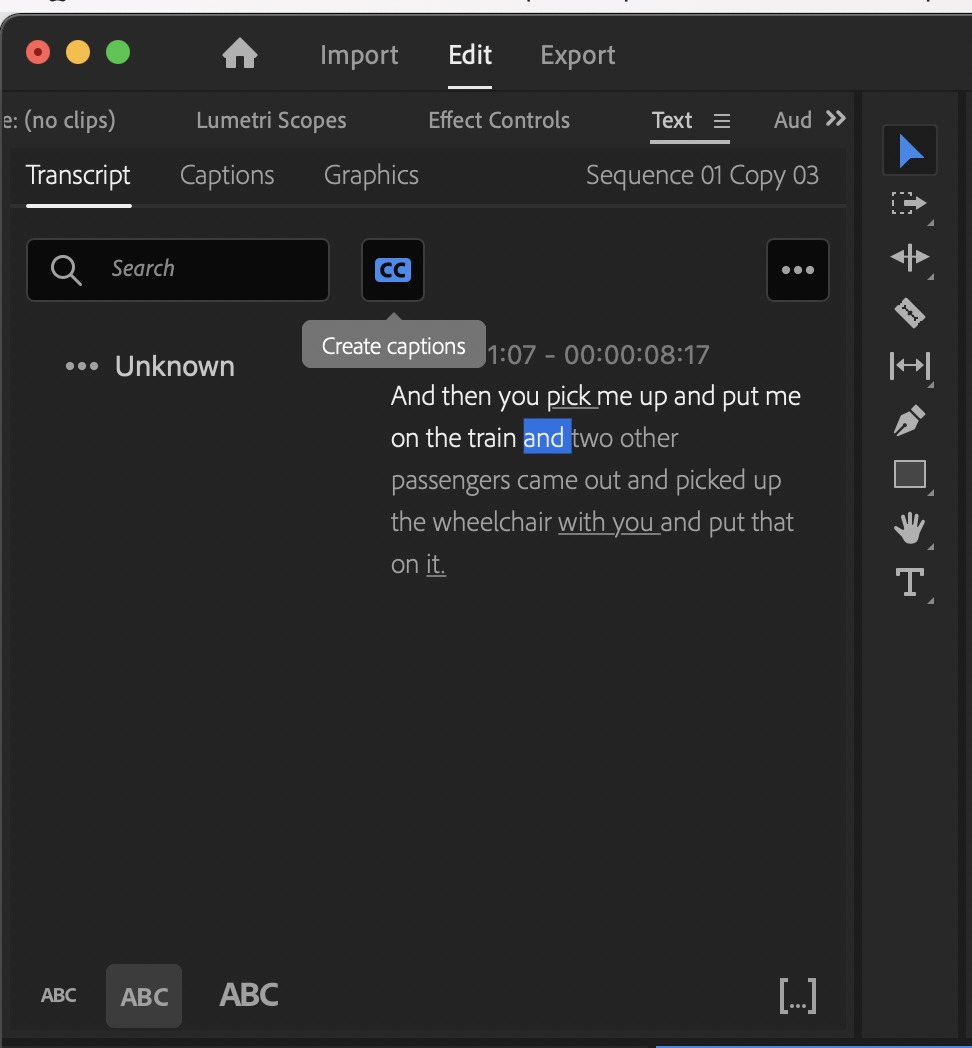
Click "Create Captions" in the Transcript window.
Step Three
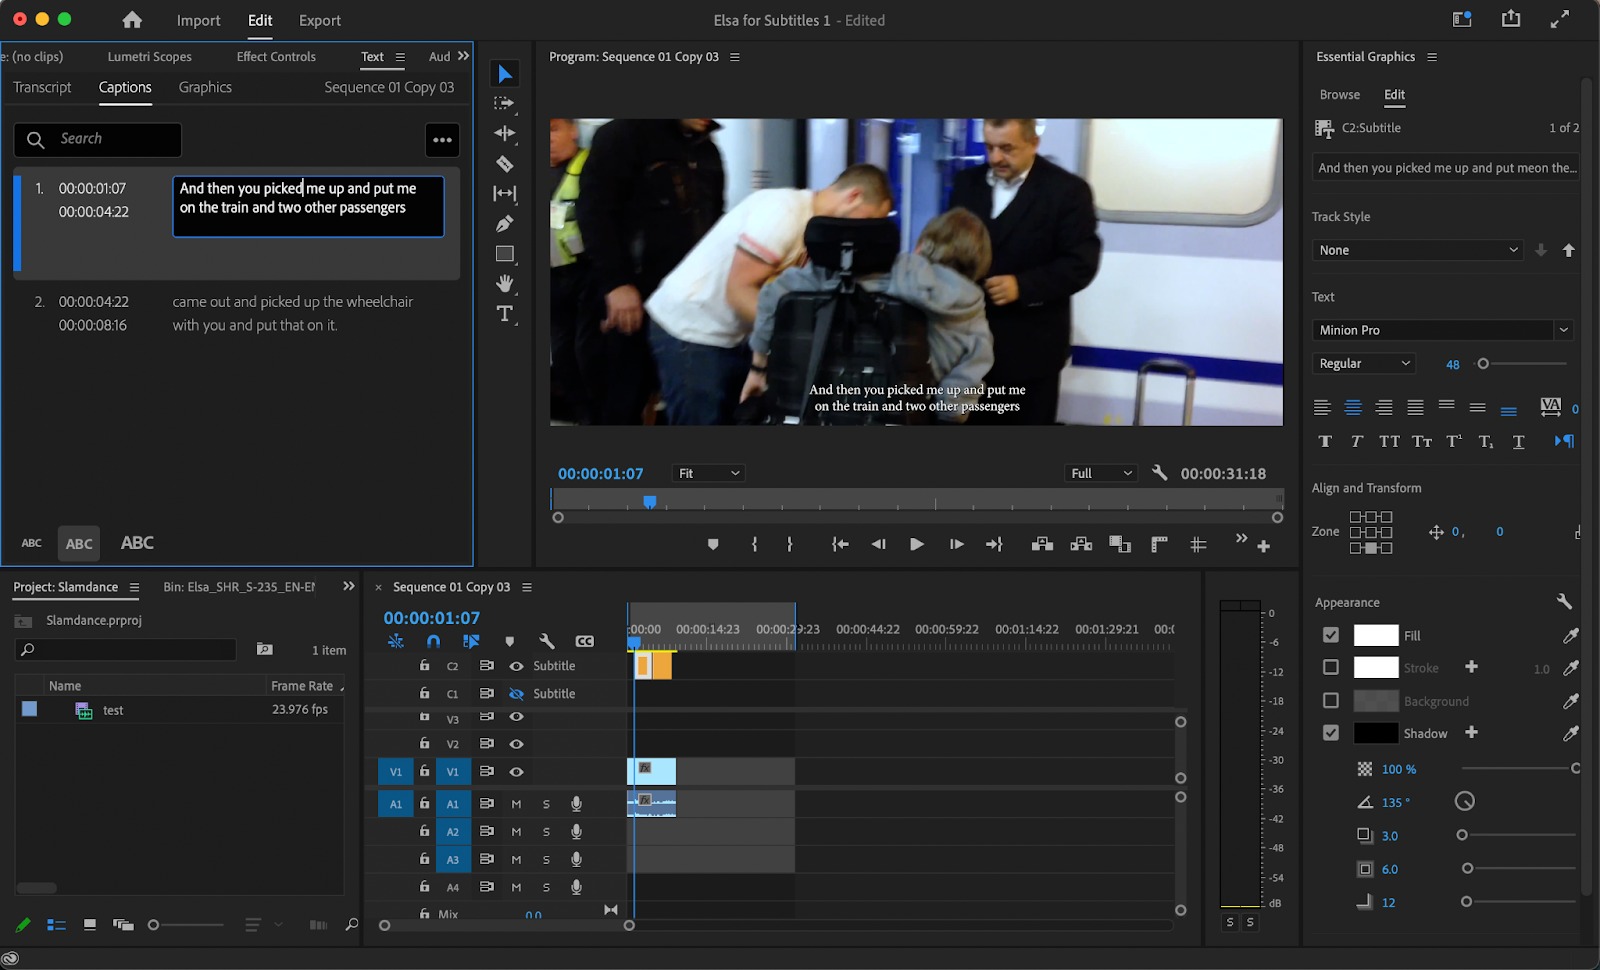
Review and edit your auto-generated captions to ensure accuracy and proper spelling, add music and audio descriptions, and include speaker identification when necessary.
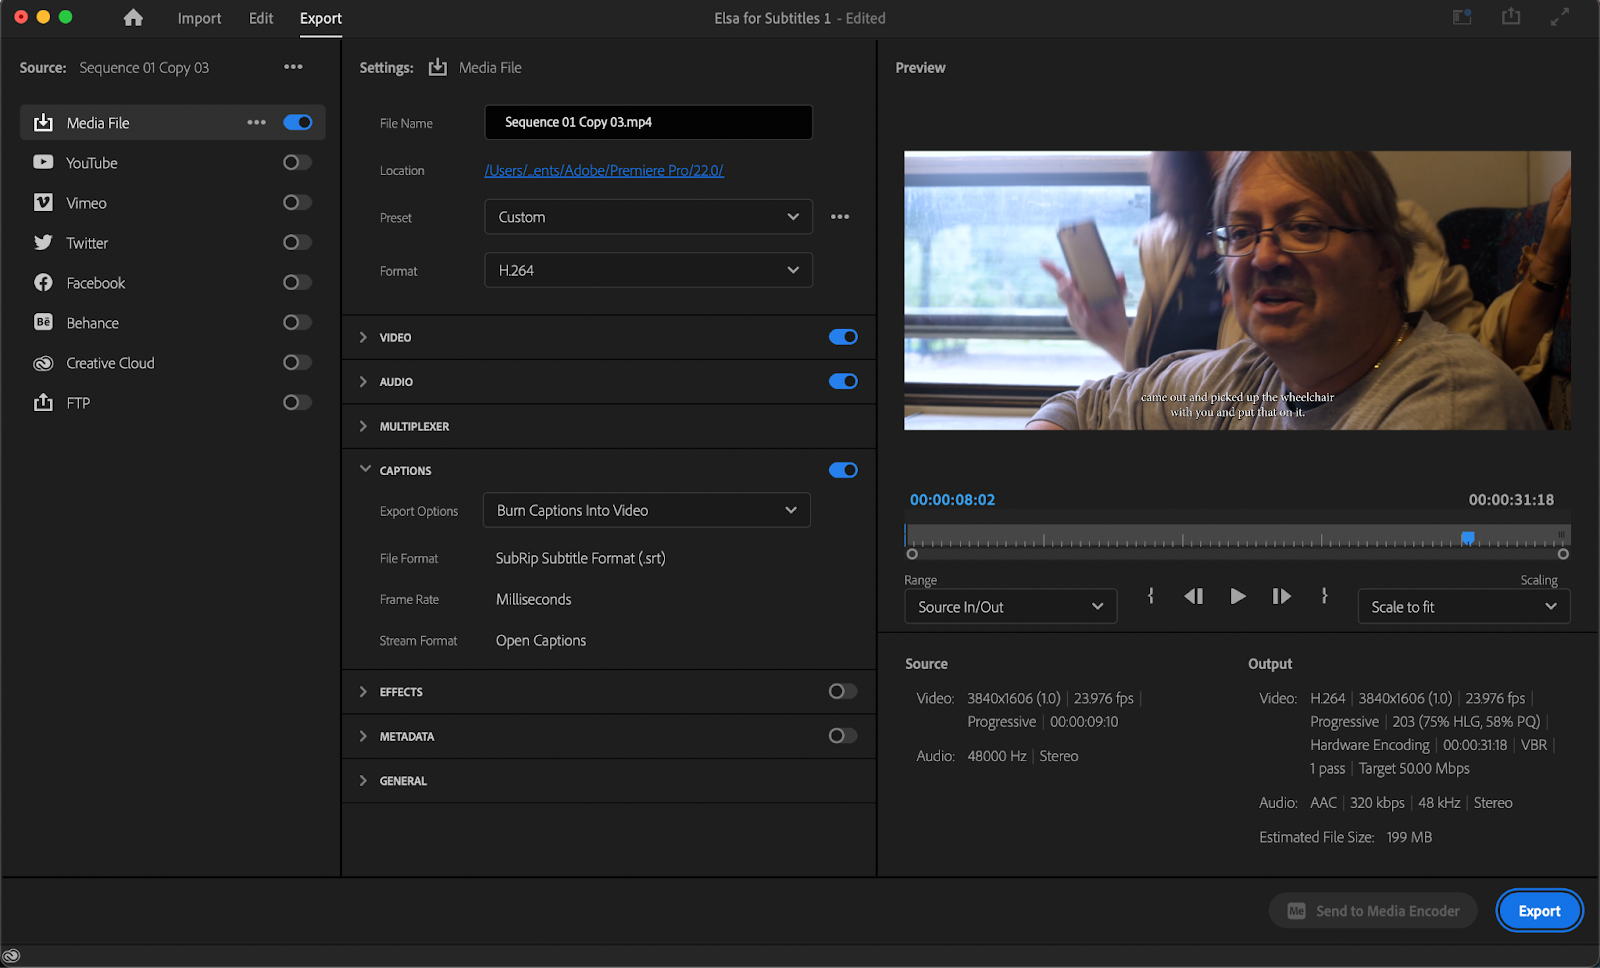
Step Four
Export your video by going to File > Export and enabling Captions in the Export Settings. Here you can select whether you want to burn captions into the video (open captions) or create an .srt caption file (closed captions).
To ensure readability, we recommend formatting your captions to be white text on a black background and that the background be no more than 85% translucency.